Installing GRAIC's Docker image on a local machine
This section provide another option such that you can run GRAIC on your local machine with Docker.
GRAIC 2022 uses the CARLA simulator, and CARLA is built on the Unreal Engine. That is why you will want to run the simulator on a machine with a powerful GPU. As for the software, you need the nvidia-docker.
Step 1. Installing nvidia-docker and getting the GRAIC docker image
Please follow the official tutorial to install the nvidia-docker.
After the installation, pull the GRAIC Docker image:
Step 2. Starting a Docker container
Now that everything has been installed, you can now run the GRAIC docker image. To run the GRAIC Docker container, use the following instructions.
Now the container is running, you can follow the instructions to run GRAIC inside the container.
Step 3. Installing new packages to the container and committing it (optional)
In case you need the root access (e.g., when installing new apt packages), you can use the following command to get a root terminal as the container is running
After installing new packages, you can use the docker commit command to commit the state of the container such that the installed packages will remain afer you stop the container.
The whole racing system consists of three independent programs, the CARLA simulator, the GRAIC infrastructure, and your controller, which should be started in three terminals. If you are using Docker, you can get a new terminal connecting to the running container by running
where graic_con is the name of the running container.
Running the CARLA simulator
If you are using Docker, run the following command in a new terminal
If you are using AWS, run the following command in a new terminal
If everthing works, you shoule be able to see the CARLA window.
Running the GRAIC infrastructure
First, you need to update the code. To do that, run the following command
Then, run the following command
Running the controller
The controller runs as a ROS node. The entry of the node is provided by GRAIC, which is a file called agent_wrapper.py. This file will import the user’s controller from a file called user_controller_file.py and also communicate with the GRAIC infrastructure. For testing, you can use the baseline controller provided in the GRAIC repository as follows.
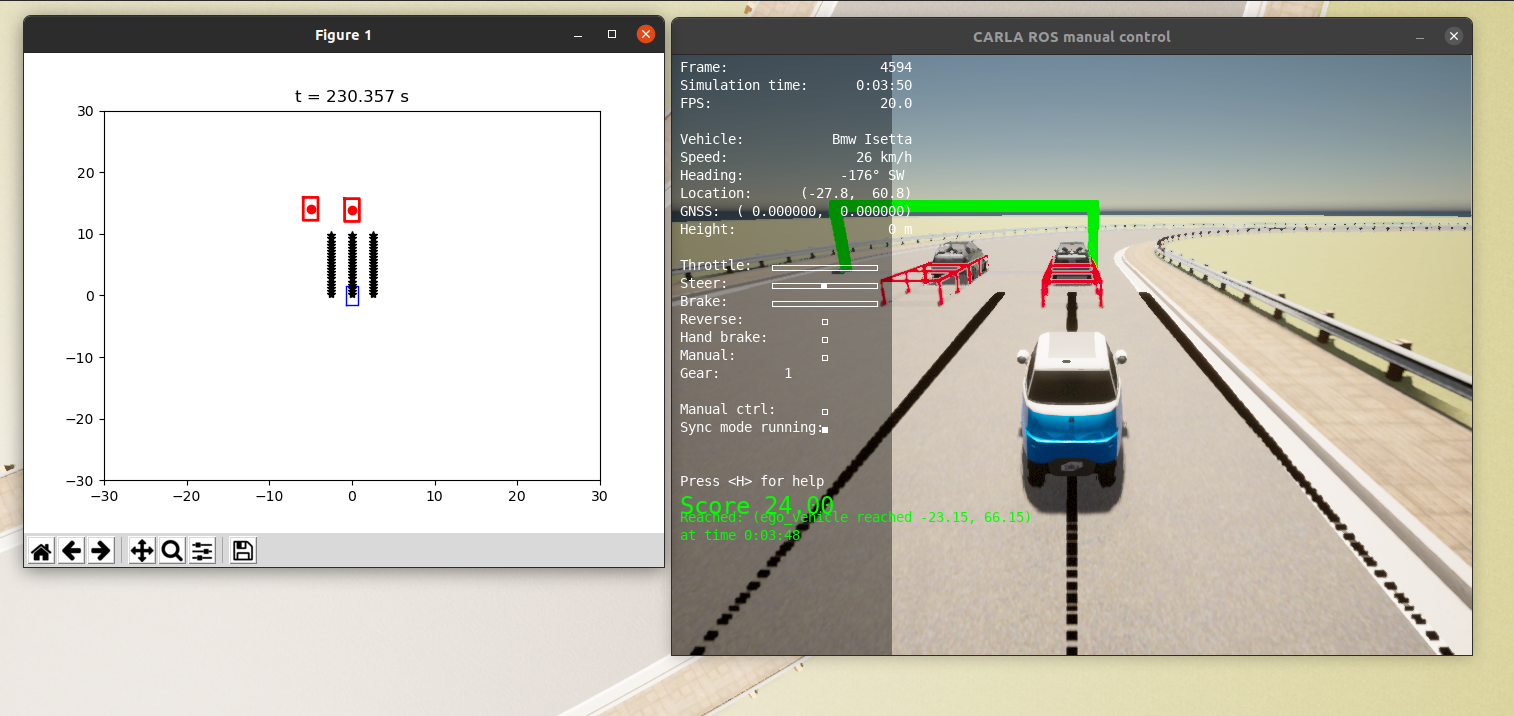
The vehicle should start moving and a score should appear when the race terminates. You should be able to see the following two windows: one is for the chase camera view, and the other one is the top view 2D visualization. In the 2D visualization, the blue box is the ego vehicle, black dots are the lane markers, and red boxes are the obstacles. If you want to disable the 2D visualization, just change vis2D:=True to vis2D:=False in the above command.
To run your own controller, just replace ~/workspace/graic-workspace/src/graic_core/src/baseline.py in the above command with the path to your controller file.
You can use the baseline controller as a template. In this file, only the class Controller is necessary. You can modify this class to implement your own controller. To further understand how to create controllers, take a look at the interfaces described on our docs page.