Installing GRAIC on AWS
Requirements
- An AWS account
- A NoMachine client, which can be downloaded from https://www.nomachine.com/
Note that the AWS has some costs associated with it. We recommend to use a local environment to develop the code and only use the EC2 instance to test your code. Don’t forget to turn off your instance when you are not working; otherwise timer will keep counting and charge you. You can check out more info on pricing at these links:
Video Tutorial
(A written tutorial is included after this video tutorial)
Note that Step 1.1 (Choose AMI) is outdated. Please review Step 1.1 and return to the video for Step 1.2. Additionally, Step 1.8 (Setting a password for Ubuntu) is not included in this video tutorial. After Step 1.7 (Review and Launch), please perform Step 1.8, and return to the video for Step 2 (GUI via NoMachine).
Step 1. Creating an EC2 Instance
- Go to your AWS EC2 dashboard. On the top right corner, change the region to “US East (N. Virginia) us-east-1”. This step is necessary because our AMI is hosted in this region. If your connection to this region is slow and you prefer another region, please contact us, and we will copy the AMI to your preferred region.
- Locate the “Launch instances” button. Click on it and then follow the instructions below.
Step 1.1 Choose AMI.
Search for “GRAIC_2023” and you should be able to find some AMIs in “Community AMIs”. 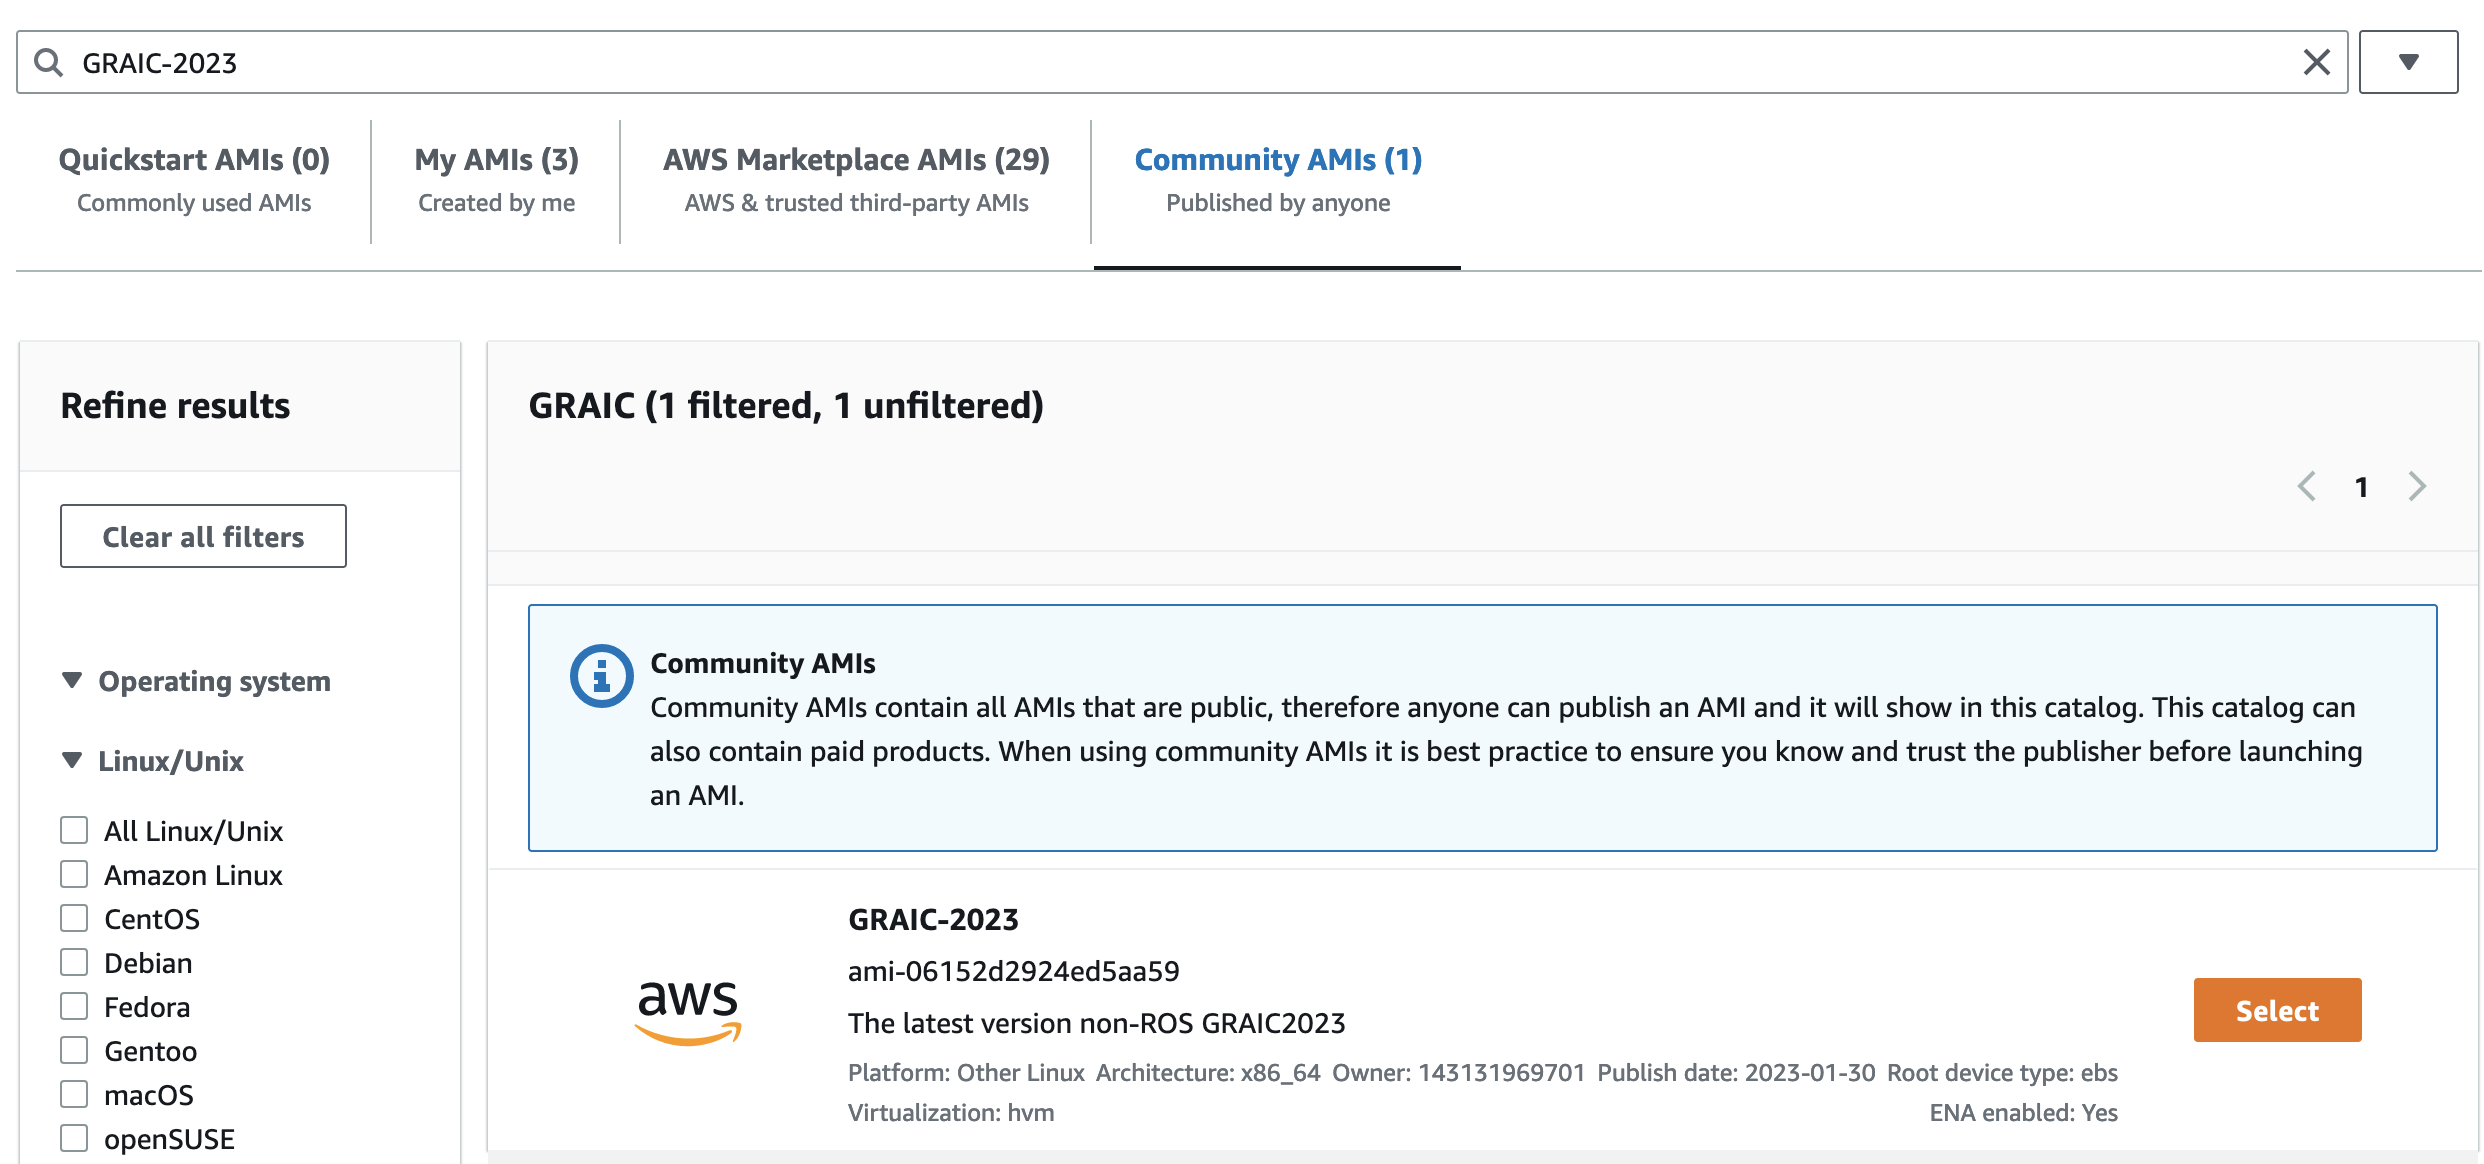
Step 1.2 Choose an Instance Type
Choose “g4dn.4xlarge”. You can also choose “g4dn.8xlarge” if you need more CPUs.
Step 1.3 Configure Instance Details
Leave this section unchanged.
Step 1.4 Add Storage
Leave this section unchanged.
Step 1.5 Add Tags
Leave this section unchanged.
Step 1.6 Configure Security Group
Click on “Add Rule” and add port 4000 as shown in the figure. Please note that we set the sources for both ports to “Anywhere” for simplicity, but it would be safer to restrict the sources to a smaller set, for example, the subnet owned by your university. 
Step 1.7 Review and launch
Finally, click on the “Launch” button which should appear at the lower right corner. 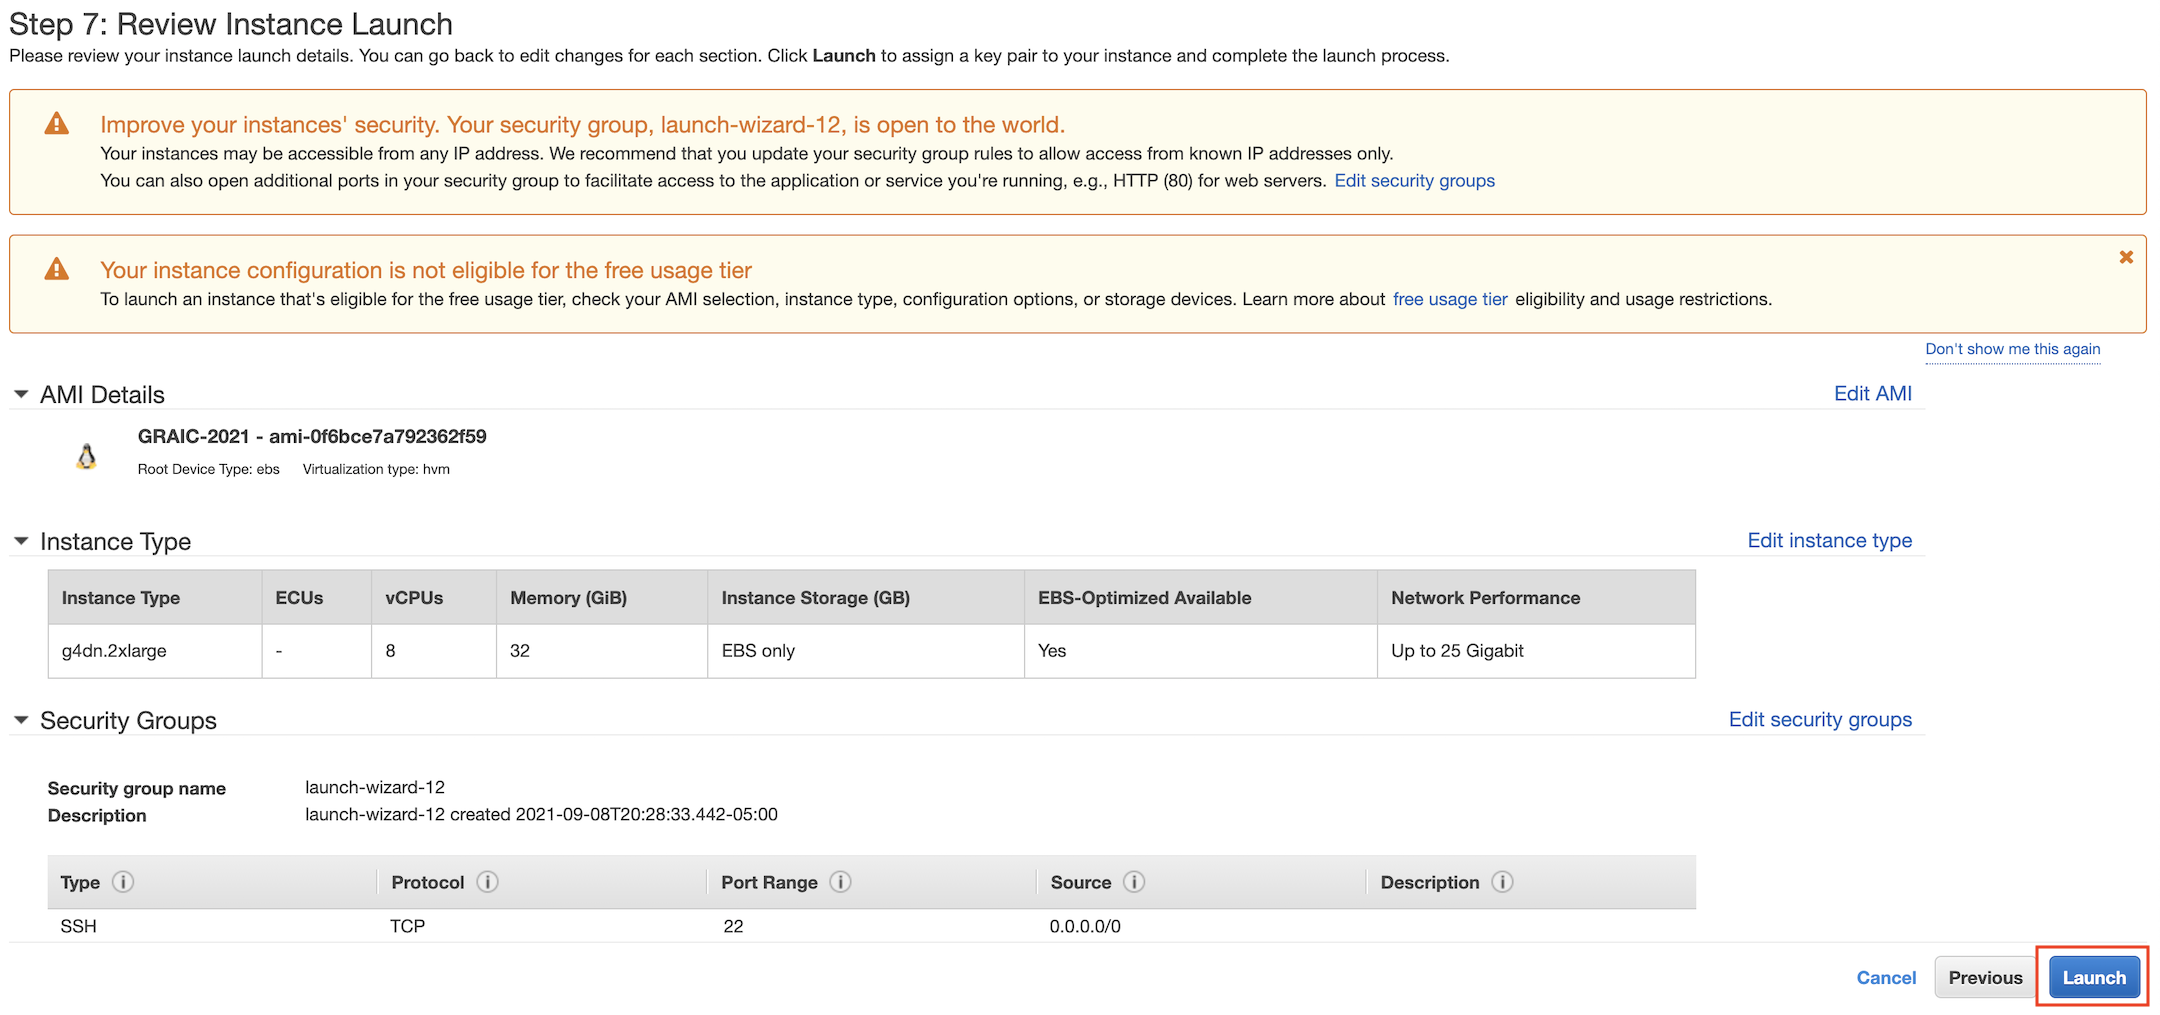
A pop-up window should appear and ask you to select an existing key pair. If you don’t have an existing key pair, select “Create a new key pair”, give it a name, and “Download Key Pair”. Then “Launch Instances”. 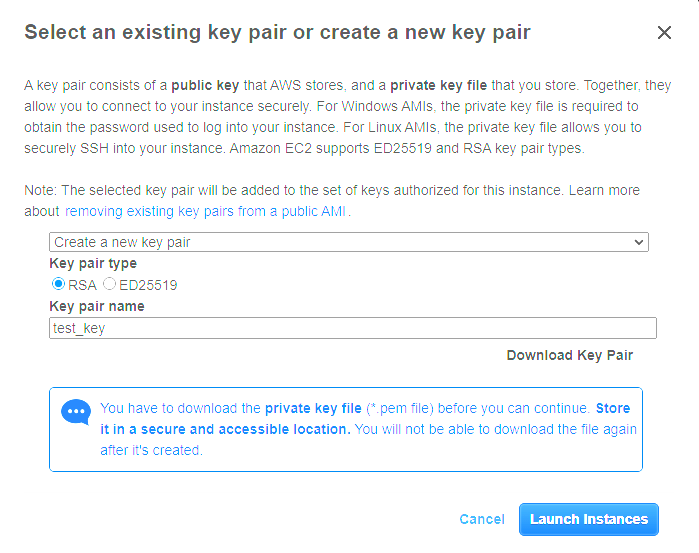
It might take several minutes to set up. Locate the new instance in your EC2 dashboard, and you can find its Public IPv4 address there.
Step 1.8 Setting a password for the user “ubuntu”
You may want to set a strong password for the main user “ubuntu”. To do that, select the new instance in your EC2 dashboard and click on “Connect” which should appear at the upper right corner. 
Then you should be redirected to the page as shown in the figure. Change the username to “ubuntu” and click on “Connect”. 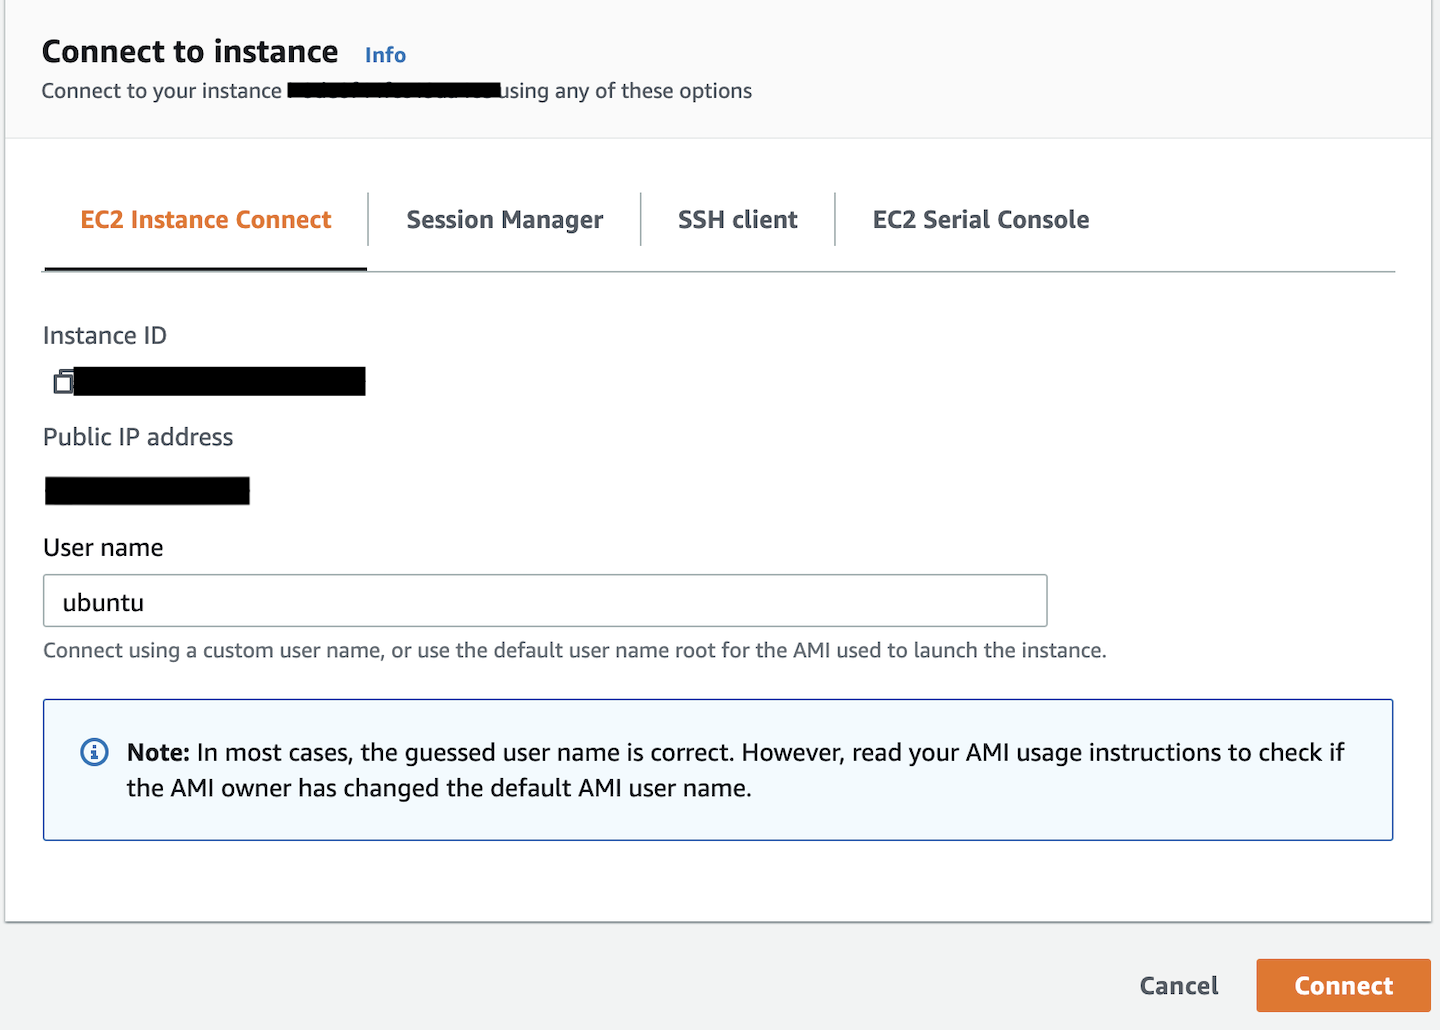
You should be able to see a new window which looks like the following picture. Change your password by running command
and following the prompts. 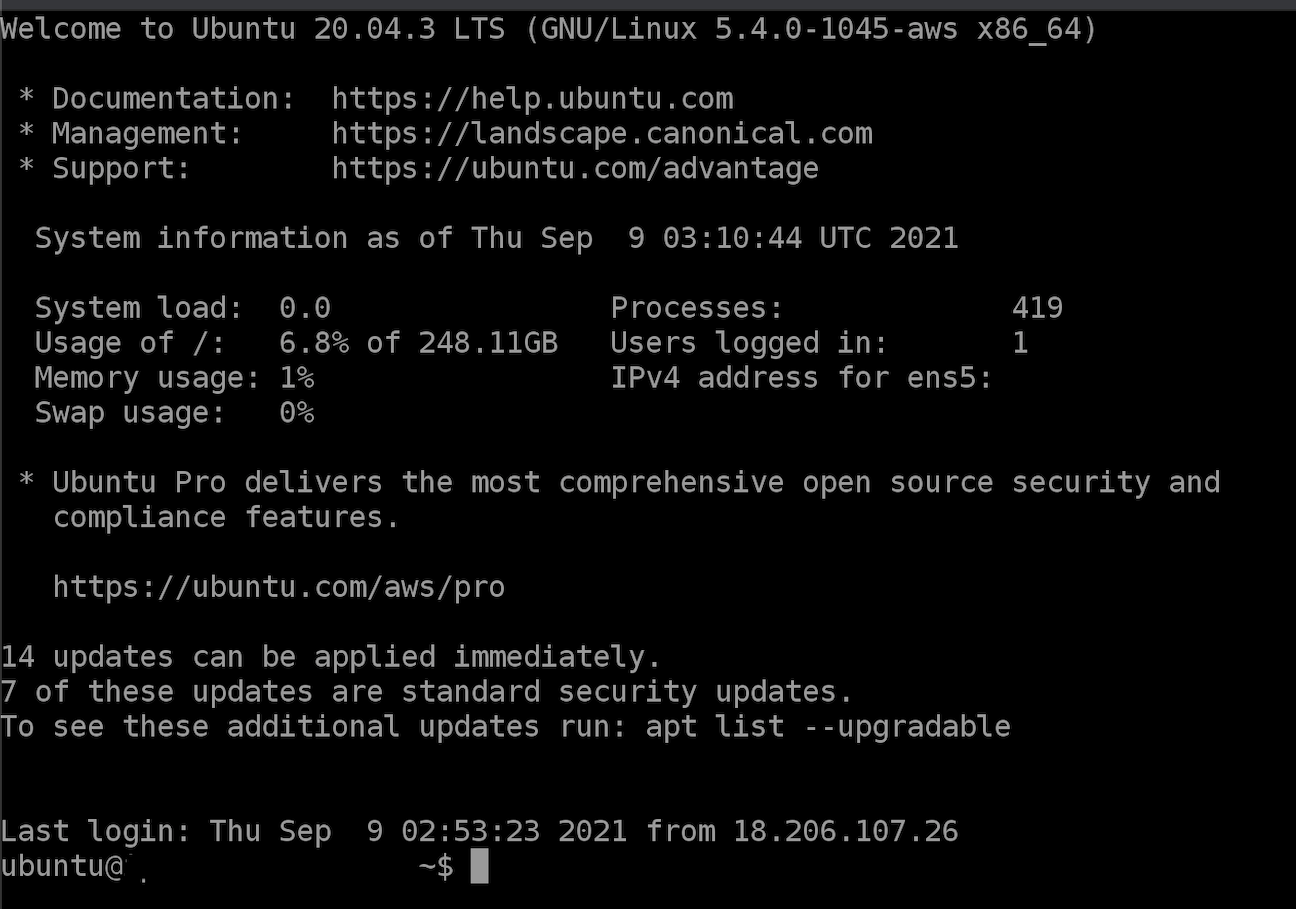
Step 2. GUI via NoMachine
Open NoMachine, click on “Add” which appears at the upper left corner. 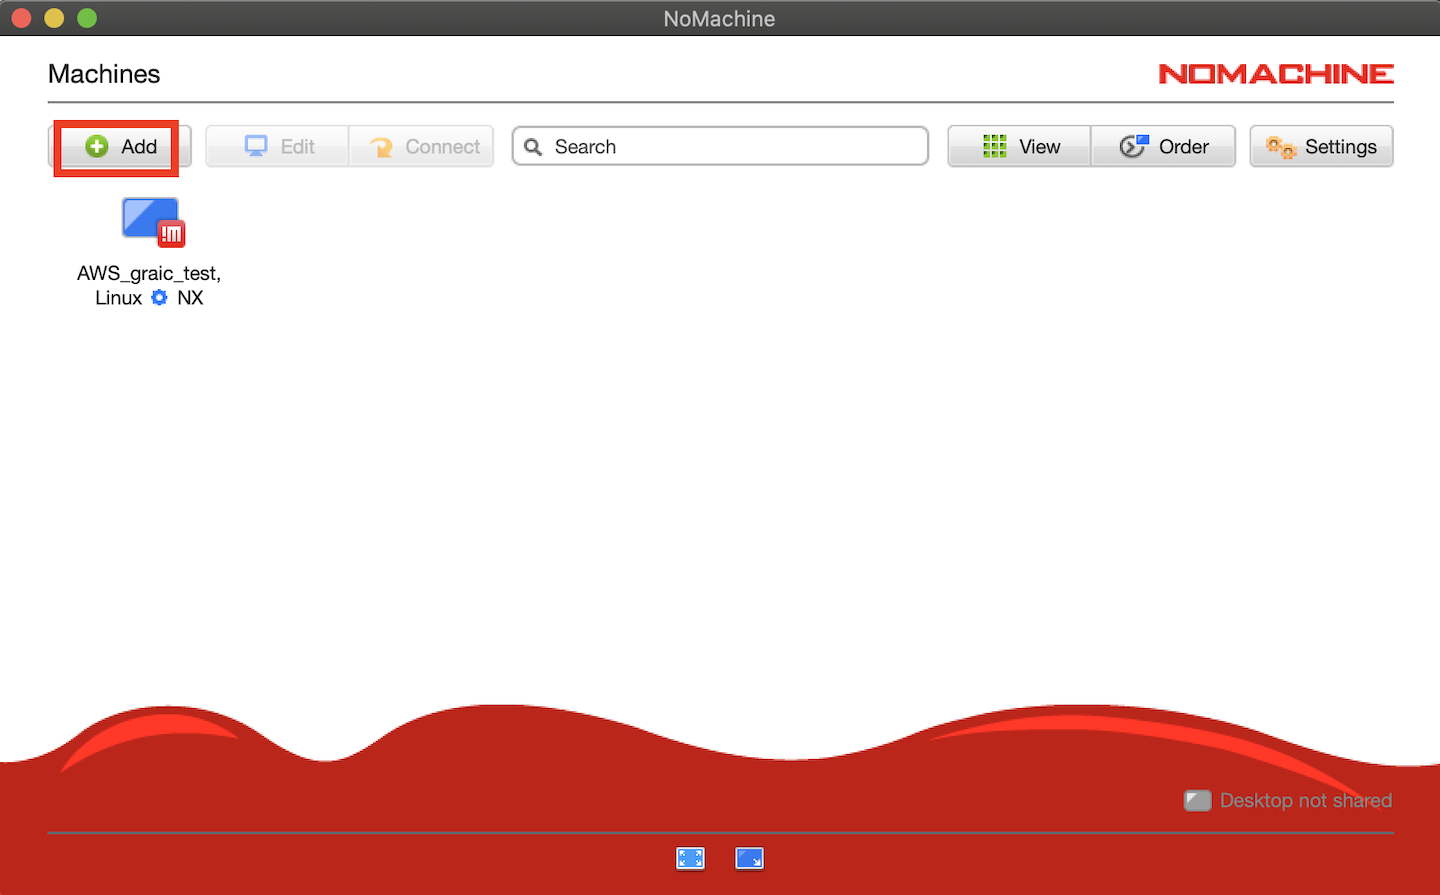
Choose whatever name you like, and fill “Host” with your instance’s Public IPv4 address. Set “Port” to 4000 and use the NX protocol. 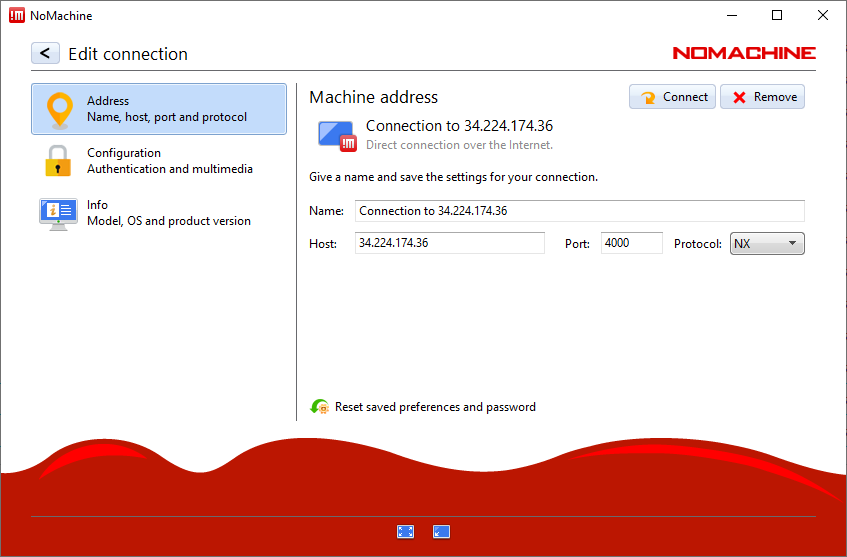
Click on “Configuration” on the left. Select “Use key-based authentication with a key you provide” and click on the “Modify” button. Then, select the key file downloaded in Step 1.7. Go back and click on “Connect”. If it says “key is missing”, click on the “Modify” button, select the key you downloaded, and try again. This might be a bug of NoMachine. 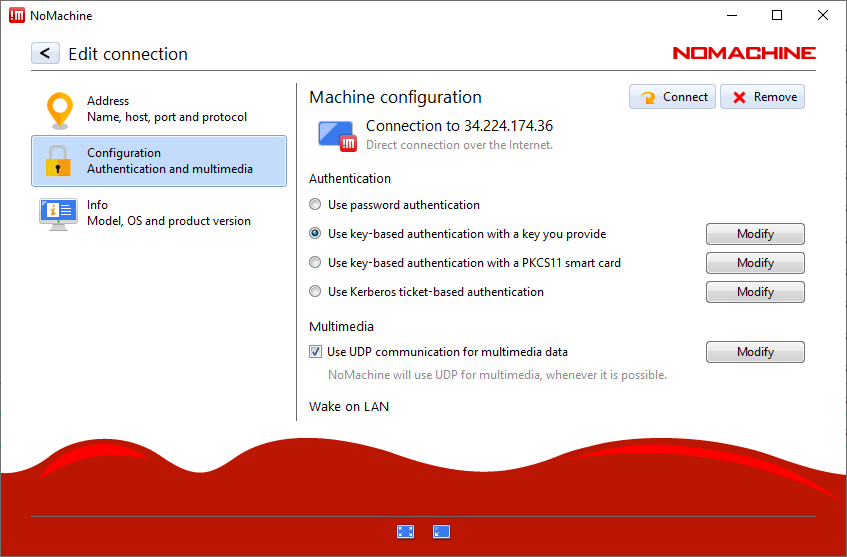
If asked, the username is “ubuntu”. After you logged in, the simulator, scenario runner, and the customized GRAIC script have already been installed at
. Please refer to the instruction in the Final Section “Installing GRAIC Customized Scripts” of Local Installation section to run any experiments.